N.Y. Renovation Services
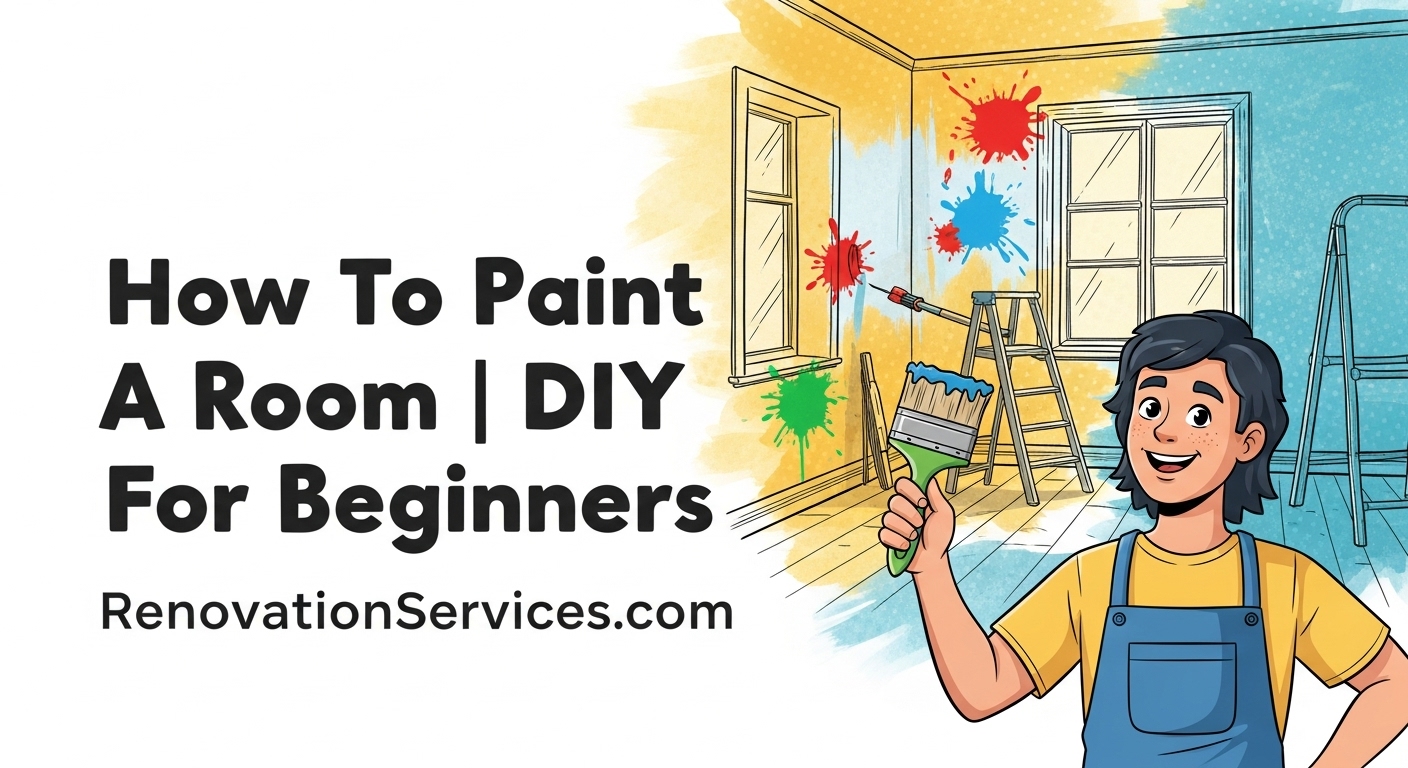
How To Paint A Room | DIY For Beginners (An NYC Homeowner’s Guide)
Want to give a room in your Manhattan loft, Brooklyn brownstone, or Queens co-op a fresh new look? Painting is one of the easiest ways to make a big change! But if you’ve never done it before, it can seem a little scary. Don’t worry! This guide, filled with expert painting advice, will teach you, a beginner DIYer in NYC, how to paint a room like a pro, even without using tons of blue painter’s tape everywhere! We’ll cover everything from picking tools to the final touches. Let’s make your painting project in Staten Island or Long Island a huge success! Of course, if DIY isn’t your thing, RenovationServices.com is always here to help with professional painting.
1. Why Painting is a Great DIY Project (Even in NYC!)
Want to change the feel of your NYC apartment without a massive renovation? Painting is your answer! It’s one of the most budget-friendly ways to make a huge impact. A fresh coat of paint can make a room feel bigger, brighter, cozier, or just more “you.” Plus, doing it yourself can give you a real sense of accomplishment. You might think, “Oh, I can’t paint a room myself, especially in my tricky NYC apartment!” But you totally can! Many people learn how to paint a room and get amazing results. Professional painters often say that with the right techniques, you don’t even need to rely on tons of blue painter’s tape if you learn a few pro tricks for cutting in. This guide will walk you through those tricks!
Painting can be a fun weekend project. Imagine transforming your Manhattan studio from drab to fab, or giving your Brooklyn kid’s room a playful new color. And if you’re in Queens, Staten Island, or Long Island and have a bit more space, you can tackle even bigger rooms! While professional painters like us at RenovationServices.com are always here for big jobs or when you want a guaranteed perfect finish, learning how to paint a room yourself is a great skill.
Think About It!
What’s one room in your NYC home you’d LOVE to repaint? What color would you choose and why? Picturing the change can be super motivating!
2. Gathering Your Gear: What Tools Do You Need to Paint a Room?
Before you can paint a room, you need the right tools! Having good tools makes the job easier and the results better. Think of it like cooking – a good chef needs good knives! Here’s a list of essential painting tools, just like the pros use, and why each one is important for your DIY project in NYC.
Your DIY Painting Toolkit Checklist:
- Good Quality Paint Brushes:
- An angled sash brush (around 2 to 2.5 inches wide) is perfect for “cutting in” – that means painting the edges along ceilings, corners, and trim. The angle helps you get a nice, straight line.
- Don’t skimp here! Cheap brushes can leave bristles in your paint. Yuk!
- Paint Roller & Roller Covers:
- A standard 9-inch roller frame is good for most walls.
- Roller covers (the fuzzy part) come in different “naps” or thicknesses. For smooth NYC apartment walls, a 3/8-inch or 1/2-inch nap is usually best. If your walls are a bit rough or textured, a thicker nap might be needed.
- Roller Extension Pole:
- This is a lifesaver, especially for ceilings and high walls in NYC apartments! It screws onto your roller handle so you don’t have to keep climbing up and down a ladder. Your back will thank you!
- Paint Tray & Liners:
- The tray holds your paint for the roller.
- Plastic liners make cleanup SO much easier. When you’re done or changing colors, you just toss the liner!
- Paint Can Opener: A simple little tool, but essential for opening paint cans without bending the lid. A screwdriver can work in a pinch, but this is better.
- Stir Sticks: Paint needs a good stir before you use it because the color can settle at the bottom. Most paint stores give these away for free.
- Drop Cloths:
- These protect your floors and furniture from paint splatters. Canvas drop cloths are reusable and better than thin plastic for floors because they’re less slippery and absorb paint. Use plastic for furniture.
- Spackle or Joint Compound & Putty Knives:
- For filling nail holes, small cracks, and dents in your walls before you paint. You’ll need a flexible putty knife (maybe a 1.5-inch and a 3-inch) to apply it smoothly.
- Sandpaper or Sanding Sponge:
- For smoothing out spackle patches and lightly sanding walls for better paint grip. Medium (around 100-120 grit) and fine (180-220 grit) usually work well.
- Cleaning Supplies:
- Mild soap or TSP (trisodium phosphate) solution, sponges, and clean rags or paper towels for washing walls.
- You need to paint a CLEAN surface!
- Screwdriver: For removing outlet covers and switch plates.
- Ladder: A sturdy step ladder is a must for reaching high spots.
- Painter’s Tape (Optional, but Good for Beginners): While many pros develop techniques to paint without much tape, a good quality blue painter’s tape (like ScotchBlue) can be very helpful for beginners to protect trim or create sharp lines, especially if you’re not yet confident with your cutting-in skills.
- Rags & Bucket of Water: For quick cleanups of drips and spills (for latex paint).
Having these tools ready before you start will make your DIY attempt to paint a room in your NYC home go much more smoothly. You can find these at any good hardware or paint store in Queens, Staten Island, or your local neighborhood.
| Tool | Estimated NYC Price Range | Why It’s Important |
|---|---|---|
| Good Angled Sash Brush (2.5″) | $12 – $25 | Clean lines when cutting in. |
| 9″ Roller Frame & Pole | $15 – $30 | Efficiently paint large areas & ceilings. |
| Roller Covers (3/8″ or 1/2″ nap, pack of 2-3) | $10 – $20 | Smooth paint application. |
| Paint Tray & Liners (pack of 10) | $8 – $15 | Holds paint for roller, easy cleanup. |
| Canvas Drop Cloth (9×12 ft) | $20 – $35 | Protects floors, reusable. |
| Spackle/Joint Compound (1 quart) | $8 – $15 | Fills holes/cracks for smooth walls. |
| Putty Knife Set | $7 – $15 | Applies spackle smoothly. |
| Sandpaper Assortment Pack | $8 – $12 | Smooths patches & preps walls. |
| Blue Painter’s Tape (1 roll) | $6 – $10 | Helps create sharp lines (optional). |
| Cleaning Supplies (TSP, Sponges) | $10 – $20 | Ensures walls are clean for paint adhesion. |
| Estimated Basic Toolkit Total: | $104 – $207 | Excludes paint & primer costs. |
3. The Secret to a Pro Finish: Amazing Prep Work!
Ask any professional painter, and they’ll tell you: the secret to a beautiful, long-lasting paint job isn’t just the painting part – it’s the PREP WORK! This is especially true when you paint a room in an older NYC building. Taking your time here will make a HUGE difference.
Your Prep Work Checklist – Don’t Skip These Steps!
- Clear the Room (As Much as Possible):Move all furniture to the center of the room and cover it completely with drop cloths or plastic sheeting. If you can, move smaller pieces out of the room entirely. This gives you space to work and protects your stuff. In a cozy Manhattan studio, this might be tricky, but do your best!
- Protect Your Floors:Cover the entire floor with canvas drop cloths. Tape them down along the edges of the baseboards if you’re worried about them shifting.
- Remove Hardware:Using your screwdriver, take off all electrical outlet covers and switch plates. Also, remove any door hardware (like knobs) if you’re painting doors, or protect it well with tape. Put all the little screws in a plastic baggie so you don’t lose them!
Pro Tip from RenovationServices.com:
Label your baggies or tape screws to the back of each plate so you know exactly where they go when it’s time to put them back on. It saves a lot of guesswork later!
- Clean Those Walls!:Walls get dusty and grimy, especially in NYC! Paint won’t stick well to dirt. Wash your walls and trim with a mild soap and water solution, or use a product called TSP (trisodium phosphate) if they’re really greasy (like in a kitchen). Rinse with clean water and let them dry completely. This is a super important step when you paint a room.
- Scrape and Repair:Look for any loose or peeling paint. Use a putty knife or paint scraper to gently remove it until you only have paint that’s stuck on well. Then, use your spackle or joint compound and putty knives to fill all those nail holes, dents, and cracks. For bigger cracks in old plaster walls, you might need to use joint tape with the compound for extra strength. This is common in many Brooklyn brownstones or pre-war buildings.
Scenario: Prepping Old Plaster Walls
Your Manhattan apartment has beautiful old plaster walls, but they have many hairline cracks and old picture hook holes. You’ll need to spend extra time carefully filling these with a flexible spackle, possibly using fiberglass mesh tape for larger cracks, to ensure a smooth surface before you even think about applying primer. This detailed prep is key if you want to truly paint a room to a high standard.
- Sand It Smooth:Once your spackle patches are completely dry (check the instructions on the container!), it’s time to sand. Use your medium-grit sandpaper or sanding sponge to smooth out the patches so they’re flush with the wall. Then, give all your walls a light sanding with fine-grit sandpaper. This helps the new paint stick better. It creates a little “tooth” for the primer and paint to grab onto.Safety Note for Older NYC Homes: If your home was built before 1978, there’s a chance the old paint layers contain lead. Sanding lead paint can create dangerous dust. The EPA has strict rules for this. If you suspect lead paint, it’s best to test for it and consider hiring professionals like RenovationServices.com who are certified in lead-safe work practices. You can learn more at epa.gov/lead.
- Wipe Down Dust: After sanding, there will be fine dust EVERYWHERE. Use a slightly damp cloth or a tack cloth to wipe down all the walls, trim, and baseboards. You want a perfectly clean surface before priming. A shop vacuum with a brush attachment is also great for this.
- Tape Edges (If Using): If you’re using painter’s tape, now is the time to apply it carefully along trim, baseboards, and where the walls meet the ceiling (if you’re not confident cutting in freehand). Press the tape down firmly with a putty knife to get a good seal and prevent paint from bleeding under it.
Phew! That seems like a lot, right? But trust us, this prep work is what separates an okay DIY paint job from a “Wow, did you hire a pro?” paint job when you paint a room. Taking 70-80% of your total project time on prep is not uncommon for professionals!
What Do You Think?
After reading about all these prep steps, does it make you more or less likely to want to tackle painting yourself? What step seems like the biggest challenge for your NYC space?
4. Choosing Your Weapon: Picking Quality Paint
Now for the fun part – the paint itself! But wait, walking into a paint store in NYC can be overwhelming. So many brands, types, and sheens! How do you choose the right one to paint a room so it looks great and lasts, especially in a demanding environment like a Manhattan apartment or a busy Brooklyn family home?
Why Quality Paint Matters (A Lot!)
Using “good quality paint” is key advice from professionals. It might be tempting to save a few dollars on cheaper paint, but here’s why splurging a little on quality is usually worth it:
- Better Coverage: Good paints have more “solids” (the actual color stuff). This means they cover the old wall color better, so you might need fewer coats. That saves you time and even paint in the long run!
- Easier to Apply: Higher quality paints tend to go on smoother, with fewer drips and roller marks. This makes the job less frustrating for a DIYer.
- Durability & Washability: Better paints are tougher! They resist scuffs, stains, and fading much better. Plus, many are washable, meaning you can gently wipe off fingerprints or marks without damaging the paint. This is a huge plus for high-traffic areas or homes with kids in places like Staten Island.
- Truer Color & Better Finish: Quality paints just look richer and more beautiful on the wall. The color stays true over time, and the finish (like matte or eggshell) looks more even and professional.
Think of it this way: you’re putting a lot of effort into prep work. Using good paint helps make sure all that hard work really shines!
Understanding Paint Types & Sheens
Latex (Water-Based) vs. Oil-Based (Alkyd)
Most interior wall paint used today is **latex**, which is water-based. Here’s why it’s popular for when you paint a room:
- Easy cleanup with just soap and water!
- Lower odor (less smelly) than oil-based paints.
- Dries relatively quickly.
- Flexible and less likely to crack with temperature changes in your NYC apartment.
- Many good quality latex paints are also low-VOC or zero-VOC, which is better for your indoor air. The EPA provides guidance on VOCs in paints.
Oil-based (alkyd) paints used to be common, especially for trim and doors because they dry to a very hard, durable finish. However, they have strong fumes, require mineral spirits for cleanup, and can yellow over time. Due to regulations and the quality of modern latex paints, oil-based options are less common for general interior DIY projects today. For most of your room painting, good quality latex is the way to go.
Choosing a Sheen (How Shiny Should It Be?)
The “sheen” refers to how shiny the paint looks when it’s dry. Here are the common ones, from least shiny to most shiny:
- Flat (or Matte): No shine at all. Great for hiding imperfections on walls (common in older NYC buildings!). Gives a rich, velvety look. Downside: Can be harder to clean; not ideal for super high-traffic areas or kids’ rooms. Often used for ceilings.
- Eggshell: Has a tiny bit of shine, like an eggshell! It’s more durable and easier to clean than flat. A very popular choice for living rooms, dining rooms, and bedrooms in Queens or Long Island homes.
- Satin: A bit more shine than eggshell, with a soft glow. Even more durable and easier to clean. Great for hallways, kids’ rooms, and sometimes kitchens or bathrooms (if it has good mildew resistance).
- Semi-Gloss: Noticeably shiny. Very durable and super easy to clean! This is the top choice for trim, doors, bathroom walls, and kitchen walls because it stands up well to moisture and scrubbing.
- High-Gloss: Very, very shiny, almost like plastic or enamel. Super durable and cleanable, but it shows EVERY imperfection on the wall. Usually used for specific furniture pieces or very modern, high-style trim.
Pro Tip from RenovationServices.com:
For most NYC apartment walls, an **eggshell or satin finish** offers a great balance of a nice look and good washability. For bathrooms and kitchens, consider a satin or semi-gloss specifically designed for high-humidity areas (often labeled “Kitchen & Bath” paint). And for ceilings? Flat white is almost always your best bet to hide imperfections and make the room feel taller.
Don’t Forget Primer!
Primer is like the “glue” between your wall and your new paint. It helps the paint stick better, covers stains, and gives you a more even color for your topcoat. You’ll almost always want to prime before you paint a room, especially if:
- You’ve patched a lot of holes (spackle absorbs paint differently than the wall).
- You have stains (water stains, crayon marks). Use a stain-blocking primer.
- You’re painting a light color over a very dark old color. A tinted primer can help.
- You’re painting a very glossy old surface. A bonding primer helps the new paint grab on.
Ask the experts at your local paint store or contact RenovationServices.com for advice on the best primer for your specific NYC wall conditions and the paint you’ve chosen. You can also check our guide to choosing primers for NYC walls.
| Sheen | Shine Level | Durability/Washability | Hides Wall Flaws? | Best For… |
|---|---|---|---|---|
| Flat/Matte | None | Lower | Excellent | Ceilings, low-traffic adult bedrooms |
| Eggshell | Low, subtle | Good | Good | Living rooms, dining rooms, most bedrooms |
| Satin | Medium, soft glow | Very Good | Fair | Hallways, kids’ rooms, kitchens, bathrooms |
| Semi-Gloss | Noticeable shine | Excellent | Poor (shows flaws) | Trim, doors, bathroom & kitchen walls, cabinets |
5. Cutting In Like a Boss: Getting Those Crisp Edges
“Cutting in” is the fancy painter term for carefully painting the edges and corners of your room with a brush before you use the roller on the big flat parts. This is where you create those nice, sharp lines where the wall meets the ceiling, trim, or another wall of a different color. It’s a key step when you paint a room for that professional look, and you can do it without tape with a bit of practice!
How to Cut In (The No-Tape Method):
- Load Your Brush Correctly: Dip your good quality 2-2.5 inch angled sash brush about 1/3 to 1/2 way into the paint. Tap off the excess gently on the inside of the can or paint pail; don’t wipe it all off on the rim like you see in cartoons! You want a good amount of paint on the brush, but not so much that it’s dripping.
- Start Away and Work Towards the Line: Begin painting about an inch away from the actual edge (e.g., where the wall meets the ceiling). Then, smoothly and steadily, move your brush towards the line, using the angled bristles to create a straight edge. It’s like guiding the paint right up to the line.
- Use Long, Smooth Strokes: Try to use long, continuous strokes rather than short, dabby ones. This helps make the line look cleaner.
- Don’t Press Too Hard: A light, controlled touch is better. Pressing too hard can make the bristles spread out and cause a messy line. Let the brush do the work.
- Paint a 2-3 Inch Band: You’re creating a painted border around all the edges that the roller won’t quite reach. This band should be about 2-3 inches wide.
- Work in Sections: Cut in one wall’s edges (top, bottom, corners) before you start rolling that wall. This helps keep a “wet edge,” which means the brushed paint is still a bit wet when you roll into it, helping it blend nicely.
Where to Cut In:
- Along the ceiling line.
- Around window and door frames (trim).
- Along baseboards.
- In all the inside corners where walls meet.
- Around outlet covers and switch plates (even though you removed the plates, you’ll cut in around the electrical box).
Pro Tip for Cutting In Ceilings:
When cutting in along the ceiling, try to slightly overlap your paint onto the very edge of the ceiling itself (just a tiny bit, like 1/16th of an inch). This can create an even crisper line when viewed from below because any tiny imperfections are on the ceiling side, which is less noticeable.
Practice makes perfect with cutting in! Your first few lines might not be perfectly straight, but you’ll get the hang of it. This skill is super valuable when you paint a room and want it to look sharp.
9. DIY Not for You? When to Call RenovationServices.com!
Learning how to paint a room can be a rewarding DIY project. However, let’s be realistic – it’s also a lot of work, especially the prep! There are definitely times when calling in professional painters, like the experienced crews at RenovationServices.com, is the smarter, easier, and even more cost-effective choice for your NYC home.
Consider Professional Painters If:
- You’re Short on Time: Life in NYC is busy! If you can’t dedicate several days (or weekends) to prepping and painting, pros can get it done much faster.
- Your Walls Need a LOT of Repair: Extensive plaster damage, large cracks, water damage repairs, or complex skim coating are often best left to those with experience. Our team handles this all the time.
- You Have Very High Ceilings or Difficult-to-Reach Areas: Painting high ceilings in a Manhattan loft or navigating tricky stairwells requires special equipment and safety know-how.
- You Suspect Lead Paint: If your NYC building was built before 1978, disturbing lead paint is a serious health hazard. Professionals certified in lead-safe practices (like those RenovationServices.com works with or can recommend) are essential. (Source: epa.gov/lead).
- You Want a Truly Flawless, High-End Finish: While DIY can be good, pros have the touch that delivers perfectly crisp lines, even sheens, and a durable finish that lasts.
- You’re Painting Multiple Rooms or Your Whole Apartment: A large-scale painting project is a huge undertaking for a DIYer. Professionals can manage the logistics, materials, and workflow efficiently.
- You Simply Don’t Enjoy Painting (It’s Okay!): Some people love it, others don’t. If the thought of all that prep and painting fills you with dread, save yourself the stress!
At RenovationServices.com, we provide free, detailed estimates for interior painting projects of all sizes across Manhattan, Brooklyn, Queens, Staten Island, and Long Island. We handle all the prep, use top-quality paints, and ensure a beautiful result you’ll love, without you having to lift a brush (unless you want to!).
10. Your DIY Painting Questions Answered!
Even with a guide, you might have a few more questions about how to paint a room, especially in an NYC setting. Here are some common ones:
Q1: How long should I let spackle/joint compound dry before sanding and painting?
A: This is important! Drying time depends on how deep the fill is, the type of compound, and the humidity in your NYC apartment. Thin patches might dry in a few hours, but deeper fills could take 24 hours or more. Always check the instructions on the product container. It must be *completely* dry before sanding, or it will just gum up your sandpaper. Rushing this step will ruin your smooth finish!
Q2: Can I really get good results without using painter’s tape everywhere?
A: Yes, with practice! The technique called “cutting in” with a good quality angled sash brush allows you to paint very straight lines along ceilings, trim, and corners without tape. It takes a steady hand and some patience to learn, but many DIYers master it. For beginners, using tape on baseboards while you get the hang of cutting in ceilings can be a good compromise.
Q3: What’s the best way to clean my brushes and rollers after I paint a room?
A: If you used latex (water-based) paint, cleanup is much easier! For brushes, scrape off as much excess paint as you can back into the can. Then, wash the brush thoroughly with warm soapy water, working the soap into the bristles. Rinse until the water runs clear. Reshape the bristles and let it air dry (or hang it). For rollers, scrape off excess paint, then you can try washing the roller cover, but many DIYers find it easier to use roller tray liners and simply dispose of the used roller cover, especially if it was an inexpensive one. If you invested in a good quality roller cover, specialized roller cleaning tools can help.
Q4: My NYC apartment has high ceilings. Any special tips for painting those?
A: Yes! An extension pole for your roller is your best friend for high ceilings. Make sure you have a sturdy ladder for cutting in the ceiling line. Work in sections, and always maintain a “wet edge” (don’t let the paint dry before you roll the next section into it) to avoid lap marks. If your ceilings are *very* high (like in some lofts), or if you’re not comfortable on ladders, this is definitely a good time to call RenovationServices.com for professional help!
Q5: How long does new paint really take to “cure” completely?
A: That’s a great point! Paint might feel dry to the touch in just a few hours, but it’s not fully “cured” or hardened for much longer. Most latex paints take about 2 to 4 weeks to cure completely. During this time, the paint is still a bit delicate. So, try to be gentle with the newly painted surfaces – avoid scrubbing them or putting heavy furniture right up against the walls if you can. Good ventilation in your NYC apartment will help with the curing process.
Ready to Paint Your NYC Room (or Call in the Experts)?
We hope this guide, filled with expert painting techniques, helps you feel more confident to paint a room in your NYC home! Taking on a DIY painting project can be a fantastic way to refresh your space.
But remember, if the prep work seems too daunting, your ceilings are sky-high, or you simply want a guaranteed professional finish without the fuss, RenovationServices.com is here to help. Our expert painting teams serve all of NYC – Manhattan, Brooklyn, Queens, Staten Island – and Long Island.
Call Us for a Free Painting Quote: (347) 455-1741
Email Us Your Project Details
Whether you DIY or hire us, we wish you a beautifully painted room!


