
The Basement Gap Conundrum: Hiding the Seam Where Drywall Meets Rough Foundation
An NYC Pro’s definitive guide to solving the tricky transition joint between a smooth ceiling and a textured, potentially damp masonry wall without cracking or mold issues.
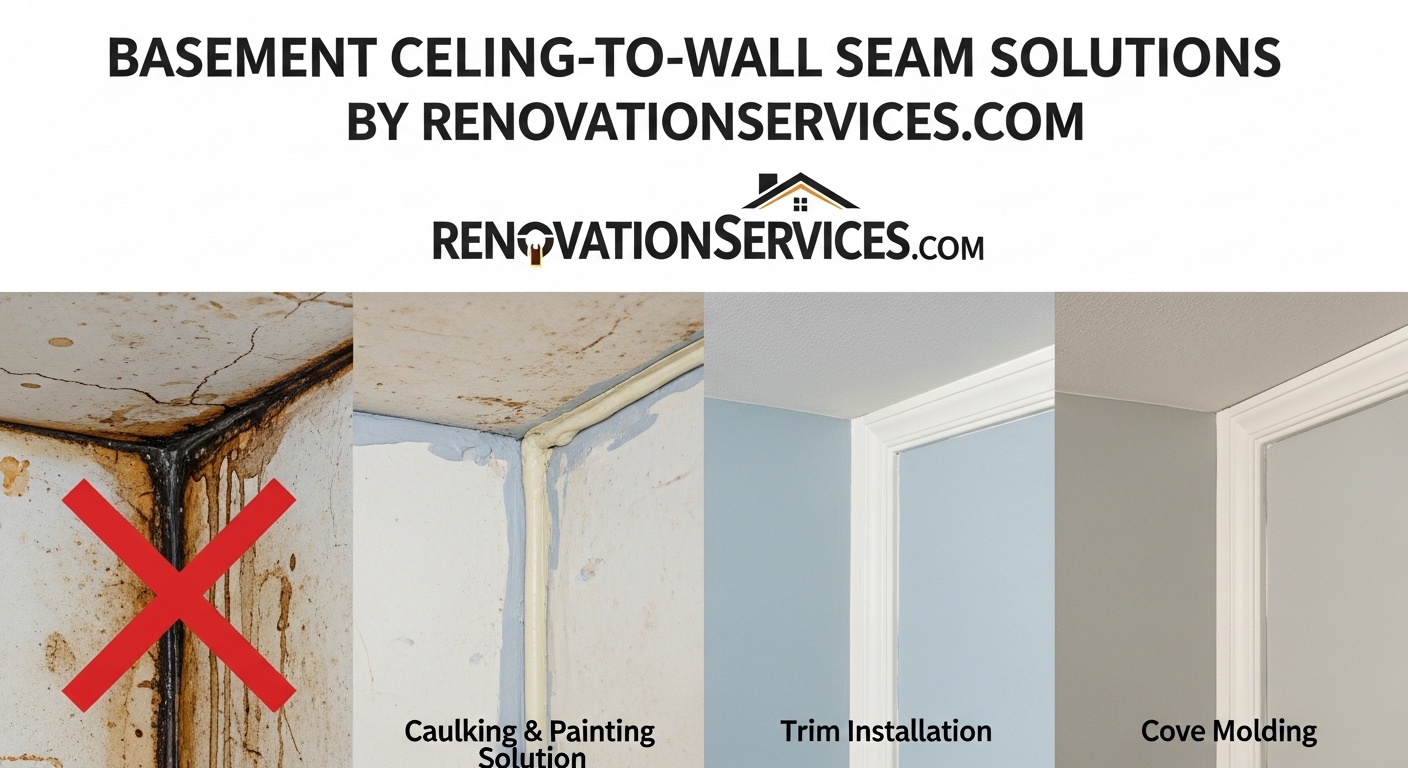
Comparison: Avoiding cracks (left) vs. Professional finishing solutions (right).
Why This Joint Fails: The Anatomy of a Basement Seam
You have encountered one of the most pervasive and frustrating challenges in basement renovation: the collision of two incompatible worlds. On one side, you have the rigid, smooth, and modern surface of a new drywall ceiling. On the other, you have the organic, textured, and often moisture-prone surface of a poured concrete, block, or stone foundation wall.
In a standard upper-floor room, this joint is handled with paper tape and joint compound (mud). The tape bonds the two smooth drywall sheets together, creating a unified corner. However, in a basement, this method is destined for failure for three critical reasons:
- Texture Incompatibility: You simply cannot bed flat paper tape onto a rough, bumpy surface. The mud will fill the voids but leave pockets of air, leading to blisters and peeling tape within months.
- Differential Movement: The ceiling framing (wood) and the foundation wall (masonry) expand and contract at different rates based on temperature and humidity. Wood moves significantly with seasonal changes; concrete is relatively static. A rigid mud joint will essentially “snap” under this tension, creating an ugly, jagged crack.
- Moisture Transmission: Basement walls in New York City—whether in Queens, Brooklyn, or Staten Island—are subject to hydrostatic pressure. Even trace amounts of moisture migrating through the concrete can degrade standard joint compound, turning it to dust or promoting mold growth behind the tape.
The solution requires moving away from rigid drywall techniques and embracing methods that allow for flexibility, breathability, and visual masking. Below, we detail the three professional-grade approaches to solving this problem.
Is Your Basement Wall Damp?
Before you hide that seam, ensure you aren’t trapping moisture. Efflorescence (white powder) or damp spots mean you need waterproofing first. Cracking finish materials is often a symptom of hidden water issues.
Schedule a Free Moisture InspectionOption 1: The High-Performance Flexible Sealant (The Modernist Approach)
If you prefer a clean, minimalist look without adding extra wood trim, a high-performance sealant is your best option. However, standard “painter’s caulk” found at big-box stores is insufficient. It typically offers only 10-15% joint movement capability and will crack within a single NYC winter/summer cycle.
The Materials: Polyurethane vs. Elastomeric
To bridge a gap between wood framing and masonry, you need industrial-grade sealants.
- Polyurethane Sealant (Recommended): Brands like SikaFlex or Loctite PL. These are designed for concrete expansion joints. They adhere tenaciously to masonry and offer 25-50% movement capability. They are waterproof and paintable but require mineral spirits for cleanup.
- Elastomeric Acrylic Latex: Brands like Big Stretch or Sashco. These are water-cleanup products that are formulated with heavy plasticizers, allowing them to stretch like a rubber band (up to 800% elongation). They are excellent for interior use but less durable against direct moisture than polyurethane.
Step-by-Step Execution
- Clean the Gap: Use a stiff nylon brush and a vacuum to remove all dust, loose mortar, and cobwebs from the gap. Sealant cannot bond to dust.
- Backer Rod (Crucial for Large Gaps): If the gap between the drywall edge and the irregular wall is wider than 1/4 inch, insert a foam backer rod. This prevents the caulk from falling into the void and creates the correct “hourglass” shape for the sealant bead, enhancing flexibility.
- Application: Cut the nozzle at a 45-degree angle. Apply a generous bead that fully contacts both the drywall edge and the masonry surface.
- The Tooling Technique: Do not simply wipe it flat. Use a caulk finishing tool or a gloved finger dipped in solvent (for polyurethane) or water (for latex) to press the bead firmly into the joint, creating a concave “fillet.” This shape is critical for allowing movement.
- Painting: Allow the sealant to cure fully (24-72 hours depending on the product). Paint the ceiling paint down onto the sealant bead, overlapping onto the wall slightly to create a crisp line.
Need a Level 5 Finish?
Achieving a seamless look requires a steady hand and expert material knowledge. If you want flawless ceilings and perfectly painted lines without the DIY headache, our finishing team is ready.
Get a Painting & Drywall QuoteOption 2: The Shadow-Line Trim (The Architectural Approach)
Sometimes, the gap is too variable—ranging from 1/8 inch to 1 inch due to the uneven foundation stones. In this case, caulk will look messy and gloopy. The architectural solution is to use a trim profile to visually “bridge” the gap without trying to seal it perfectly.
Why “Quarter Round” is the Wrong Choice
Standard quarter round is often too bulky and screams “cover-up.” It also has a curved profile that makes painting the wall line difficult. Instead, we recommend Square Stock or L-Molding (Corner Guard).
The Floating Install Method
- Material Selection: Choose a synthetic trim like PVC or Cellular Vinyl. Since this is a basement wall potentially touching masonry, solid wood may absorb moisture and rot or warp. PVC is impervious to basement dampness.
- Fastening Strategy: Nail the trim only to the ceiling framing. Do not glue or nail it to the masonry wall. By fastening it to the ceiling, the trim moves with the joists.
- The Shadow Gap: Let the trim rest gently against the high points of the textured wall. There will be gaps in the low spots. Do not caulk this bottom edge. Leave it as a “shadow line.” This intentional gap allows for air circulation (preventing trapped moisture) and allows the house to settle without cracking a caulk bead.
- Finishing: Caulk the top edge (trim-to-ceiling) for a seamless look. Paint the trim the exact same color and sheen (usually Flat White) as the ceiling. This makes the trim disappear visually, reading as an extension of the ceiling plane.
Custom Millwork & Trim Services
From simple baseboards to complex crown molding and shadow-line reveals, precision carpentry defines the quality of a renovation. Upgrade your basement with professional trim work.
Hire Our Finish CarpentersOption 3: The “Scribe and Skim” Technique (The Expert Approach)
This method is the most labor-intensive but yields the most integrated look. It involves essentially creating a custom “gasket” of joint compound that mates perfectly with the texture.
The Process
- Protection: Apply 2-inch painters tape to the foundation wall, roughly 1/4 inch below the drywall ceiling line.
- “Hot Mud” Application: Mix “setting-type” joint compound (like EasySand 45 or Durabond). This chemical-setting compound is harder and more moisture-resistant than standard drying mud.
- The Fill: Press the hot mud into the gap, allowing it to slightly overlap onto the tape on the wall.
- The Peel: While the mud is firming up but not fully hard (the “leather hard” stage), peel away the tape. This creates a razor-sharp, clean edge of compound that perfectly contours to the bumps and dips of the wall texture.
- Back-Caulk: Once fully dry, run a very thin bead of clear or paintable silicone along that microscopic hairline crack to seal it against drafts.
Planning a Complete Basement Remodel?
Don’t piece it together. A cohesive basement renovation adds significant value and square footage to your NYC home. We handle everything from permits and waterproofing to flooring and lighting.
Start Your Basement TransformationFinal Verdict: Which Method is Right for Your NYC Home?
For most homeowners in the five boroughs, Option 1 (Flexible Polyurethane Sealant) combined with Aesthetic Masking (painting the ceiling color down slightly onto the wall) is the most durable and cost-effective solution. It accommodates the inevitable vibrations from subway lines, traffic, and seasonal settling without cracking.
However, if you are aiming for a high-end finish in a finished recreational space, Option 2 (PVC Trim) provides the cleanest, most maintenance-free edge.
Remember: The basement is the foundation of your home’s health. Never cover up active leaks or mold with drywall or trim. Address the root cause first.


